Appliance Aid takes part in the Amazon Associates programme. Some links on this page are affiliate links, and a qualifying purchase earns us a commission. Your price is unchanged.
🏆 RECOMMENDED PART
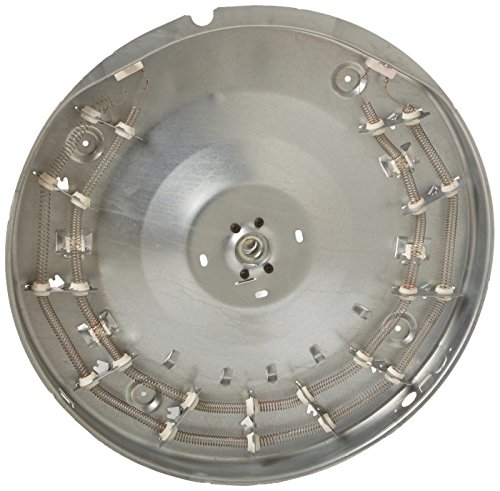
GE WE11M23 Genuine OEM Heating Element Assembly for GE Electric Dryers
- The GE Appliances WE11M23 Heating Element Assembly is a genuine OEM (Original Equipment Manufacturer) part designed and engineered to exact specifications.
- The GE WE11M23 Heating Element Assembly generates the dryer's heat.
- The GE WE11M23 replacement Heating Element Assembly for Dryers fits some models from the following brands of Dr
- The GE WE11M23 is a Factory Certified Part that replaces part numbers: 844418, WE11M0014, WE11M0021, WE11M0023, WE11M21
- The High quality GE Appliances OEM WE11M23 Heating Element Assembly is manufactured with premium materials for durability and exact fit, be sure to refer to your appliance owners manual to confirm correspondence with ...
What the WE11M23 does
The heating element generates heat inside the dryer drum to dry clothes. It consists of a coiled wire that heats up when electricity passes through it.
Symptoms when this part fails
- Dryer runs but produces no heat
- Clothes take excessively long to dry
- Dryer trips the circuit breaker
- Burning smell coming from the dryer
Compatibility
Fits the GE family. Specifically:
- Any unit originally equipped with OEM part number(s): 844418, WE11M0014, WE11M0021, WE11M0023, WE11M21.
- Check the model/rating plate inside your appliance and compare it against the fitment table on the product listing before ordering — this guide does not list specific compatible models because Amazon does not provide verified fitment data through this pipeline.
Also replaces: 844418, WE11M0014, WE11M0021, WE11M0023, WE11M21
Tools you'll need
- Screwdriver (Phillips and flathead)
- Nut driver set
- Pliers
- Work gloves
- Multimeter (optional)
Difficulty: Moderate · Time: 30-60 minutes
How to install the WE11M23, step by step
- Unplug the dryer from its power source.
- Remove the dryer's back panel or top and front panels to access the heating element.
- Disconnect the electrical wires leading to the heating element.
- Unscrew and carefully remove the old heating element assembly.
- Install the new heating element assembly, securing it with screws.
- Reconnect the electrical wires to the new element's terminals.
- Reattach the dryer panels, ensuring all connections are secure.
- Restore power to the dryer and test its heating function.
Related troubleshooting
If swapping this part doesn't fix the issue, check these next: