
BlueStars Ultra Durable 2 Packs 3390719 Dryer Thermal Fuse - Compatible with Whirlpool & Kenmore Dryers - Replaces PS11741444
- 3390719 Dryer Thermal Fuse - PACK OF 2.
- Compatible with most top name brands (Kenmore, Whirlpool, KitchenAid, Maytag), fits models: 106.97502820.
- The part is made from durable high quality material and well-tested by the manufacturer - Meet OEM.
- Inexpensive way to fix or repair a dryer. The good quality thermal fuse can be applied for a long time. It.

BlueStars 3977393 Dryer Thermal Fuse - Compatible with Whirlpool Maytag Roper Kenmore KitchenAid Dryers - Replaces AP3094244
- Please check the model number carefully before ordering. If you're unsure about the compatibility, send us.
- 3977393 Dryer Thermal Fuse (309 degrees) - PACK OF 12. It is an essential part of the dryer that prevents.
- It is made exactly fit for most top name brands (Whirlpool, Kenmore, Maytag, Roper, KitchenAid, Crosley.
- Inexpensive way to fix or repair a dryer. It will take you 15-30 minutes to repair, and you will just need.
A distinct smell of burning plastic coming from your clothes dryer means you need to stop the cycle immediately. This odor is not just unpleasant; it indicates overheating, which can pose a fire hazard if ignored. For electric dryers, pull the plug from the wall outlet. For gas dryers, turn off the gas supply valve in addition to unplugging the unit.
Cause 1: A Melted Plastic Item
One of the most common reasons for a burning plastic smell is a rogue plastic item that has melted inside the dryer. This could be anything from a forgotten pen in a pocket, a plastic toy, a hair clip, or even part of a synthetic fabric that got too hot and adhered to the drum or heating element.
How to Diagnose a Melted Item
With the dryer unplugged and cool, perform a thorough visual inspection:
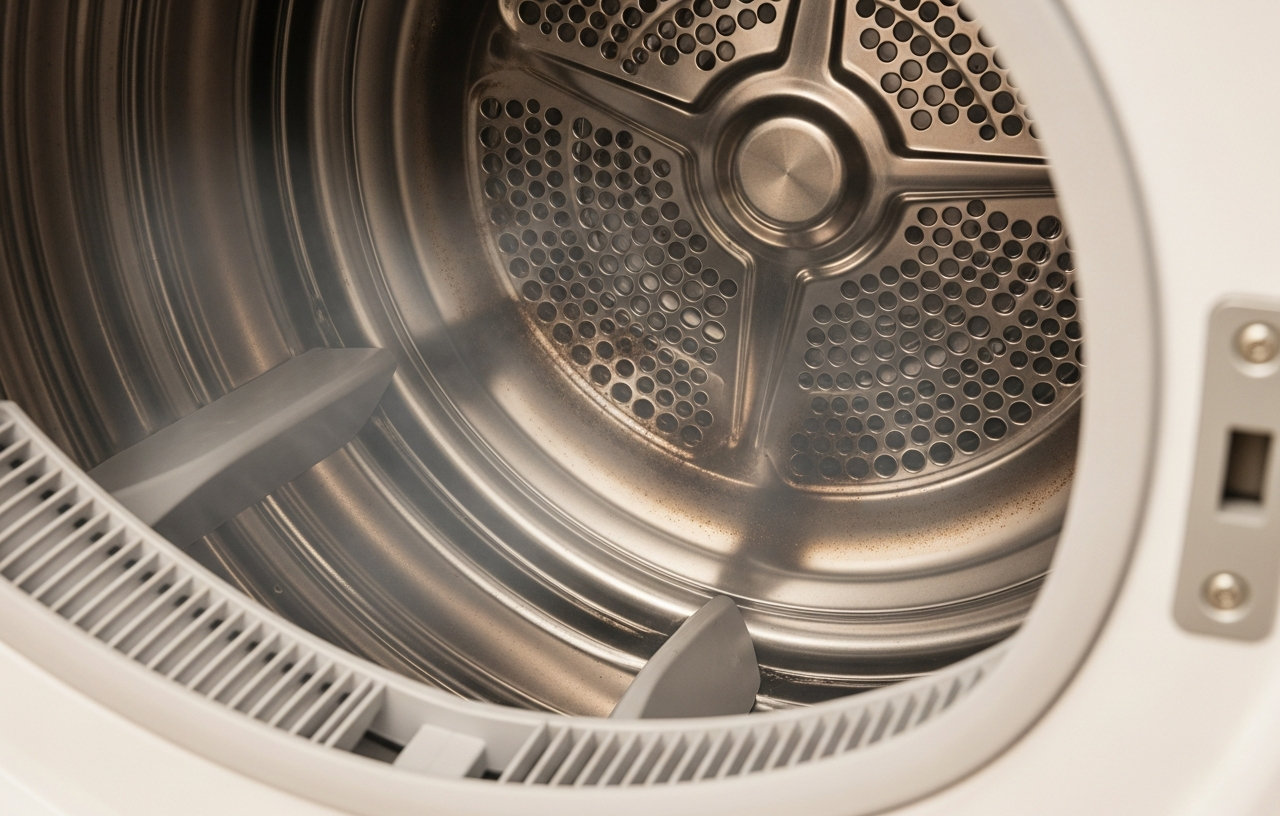
- Inspect the Drum: Use a flashlight to carefully examine the entire interior surface of the dryer drum. Look for any melted plastic residue, dark spots, or unusual textures. Pay close attention to the seams and any perforations.
- Check the Lint Trap Housing: Remove the lint trap and look into the housing where it sits. Small items can sometimes fall into this area and melt onto the heating element or wiring below.
- Examine the Heating Element (Electric Dryers): For electric dryers, the heating element is often located behind the rear panel. You will need a screwdriver to remove this panel. Once removed, visually inspect the heating element coils for any melted plastic stuck to them. Be careful not to touch the element directly, even when cool, to avoid damage.
- Inspect the Blower Wheel Area: Some small items can get past the lint trap and into the blower wheel housing. This usually requires more extensive disassembly, often involving removing the front panel or the top and front panels.
Repairing a Melted Item
If you find melted plastic:
- For Drum Residue: Allow the dryer to cool completely. Use a plastic scraper or a wooden utensil to gently scrape off the melted plastic. Avoid using metal tools, which can scratch the drum's finish. For stubborn residue, you might try a soft cloth dampened with a small amount of nail polish remover (acetone) or mineral spirits, but test in an inconspicuous area first and wipe thoroughly with a clean, damp cloth afterward to remove any chemical residue. Ventilate well.
- For Heating Element Residue: If plastic is melted onto the heating element, it is often best to replace the heating element assembly. Attempting to scrape it off can damage the element, leading to further problems. A new heating element typically costs between $50 and $200 for the part. When the dryer's airflow is restricted, lint can accumulate and overheat, leading to a burning smell that can easily be mistaken for burning plastic. A blocked vent also causes the dryer to work harder and hotter, potentially overheating electrical components and melting their plastic casings.
How to Diagnose a Blocked Vent or Lint Trap
- Check the Lint Trap: Always clean the lint trap before every load. If you haven't been doing this, a thick layer of lint could be the source of the smell.
- Inspect the Vent Hose: Disconnect the dryer from the wall vent. Check the flexible exhaust hose for kinks, crushed sections, or significant lint buildup. Clean out any visible lint.
- Examine the Wall Vent and Exterior Cap: Look inside the wall vent duct and check the exterior vent cap on your home's exterior. Make sure the flap opens freely and is not blocked by lint, debris, or even bird nests.
- Run a Short Cycle (Carefully): After cleaning the lint trap and checking the vent hose, reconnect everything. Plug in the dryer and run it on a no-heat or air-fluff cycle for a few minutes. Go outside and feel the air coming out of the exterior vent. A strong, steady airflow indicates a clear vent. Weak or no airflow suggests a blockage further inside the ductwork.
- Longer Drying Times: A less obvious symptom of a blocked vent is when your electric dryer takes too long to dry clothes. This indicates poor airflow and overheating.
Repairing a Blocked Vent
Cleaning your dryer vent system is a vital maintenance task:
- Lint Trap and Hose: Regularly clean your lint trap. Use a vacuum cleaner with a narrow attachment to clean out the lint trap housing. For the flexible vent hose, disconnect it and shake out lint, or use a vent cleaning brush.
- Ductwork Cleaning: For blockages deeper in the rigid ductwork, you will need a dryer vent cleaning kit. These kits include a long, flexible brush that attaches to a drill, allowing you to clean the entire length of the duct from the dryer connection to the exterior vent cap. This is a DIY task that costs around $20-$50 for the kit. This is a serious issue that often requires part replacement.
How to Diagnose a Failing Component
This diagnosis often requires a multimeter and some familiarity with dryer components. If you are not comfortable working with electrical systems, contact a professional.
- Thermal Fuse: The thermal fuse is a safety device designed to blow and cut power to the heating element (or the entire dryer) if the dryer overheats. While it is a safety feature, the overheating event that caused it to blow can generate a burning smell. A blown thermal fuse means the dryer will not heat or will not start at all. You can test it for continuity using a multimeter. No continuity means it is blown and needs replacement.
- Heating Element (Electric Dryers): If the heating element itself is failing or shorting, it can overheat locally, melting its housing or nearby wiring. You can test the heating element for continuity and resistance with a multimeter.
- Motor: The dryer motor has plastic components and can overheat if it is failing or if the dryer is overloaded. A failing motor might also produce a loud thumping or grinding noise. See our guide on dryer making loud thumping noise when running for more details.
- Wiring: Loose or frayed wiring can arc and overheat, melting the wire insulation. This is often accompanied by a distinct electrical burning smell, sometimes with visible scorch marks.
- Control Board: Although less common, a failing electronic control board can sometimes emit a burning smell if a component on the board overheats or shorts out.
For electrical testing, an electrical test kit is essential for safe diagnosis.
Repairing a Failing Component
- Thermal Fuse Replacement: If the thermal fuse is blown, it must be replaced. This is a relatively inexpensive DIY repair, costing around $10-$30 for the part. However, you must also address the underlying cause of the overheating, usually a blocked vent, or the new fuse will blow again. The BlueStars Ultra Durable 2 Packs 3390719 Dryer Thermal Fuse is a top pick, compatible with many Whirlpool and Kenmore models. It includes two fuses, which is helpful if the initial overheating cause is not fully resolved and the first replacement blows again.
- Heating Element Replacement: A new heating element costs between $50 and $200. This is a moderately difficult DIY repair. Professional replacement typically costs $150-$300 in labor, plus the service call fee.
- Motor Replacement: Replacing a dryer motor is a more complex and costly repair, with parts ranging from $100 to $300. Professional labor can add $200-$400 to the cost, plus the service call.
- Wiring Repair: Damaged wiring should be replaced by a qualified electrician or appliance technician. This is not a DIY task for most homeowners due to safety risks.
New Dryer Smells Like Burning Plastic
If you have a new dryer smells like burning plastic, it is often due to the initial burn-off of manufacturing lubricants, oils, or protective coatings on internal components. This is usually normal during the first few cycles. Run the dryer on a high-heat, empty cycle (or with old towels) for 15-30 minutes, with good ventilation. If the smell persists after several cycles or becomes stronger, it could indicate a defect and you should contact the manufacturer or retailer.
Hair Dryer Smells Like Burning Plastic
While this article focuses on clothes dryers, a hair dryer smells like burning plastic for similar reasons. Hair dryers can accumulate hair and dust inside, blocking airflow and causing the heating element to overheat. A small piece of plastic, like a hair clip, might also get sucked into the air intake. Disconnect the hair dryer, clean the air intake and exhaust vents thoroughly, and check for any obstructions. If the smell continues, the internal components may be failing, and replacing the hair dryer is often the safest and most practical option.
Preventative Maintenance to Avoid Burning Smells
Regular maintenance can prevent most dryer burning smells and extend the life of your appliance. Consider adding these tasks to your home appliance maintenance checklist:
- Clean the Lint Trap Every Time: This is the simplest and most effective prevention.
- Clean the Vent System Annually: Use a dryer vent cleaning kit to clear out lint from the entire ductwork.
- Avoid Overloading: Overloading the dryer restricts airflow and makes the motor work harder, leading to overheating.
- Check Pockets: Always check clothing pockets before putting items into the dryer to remove pens, plastic toys, or other small objects.
- Inspect the Dryer Drum: Periodically check the dryer drum for any signs of melted plastic or foreign objects.
When to Call a Professional
If you cannot identify the source of the burning plastic smell, if the smell persists after troubleshooting, or if you are uncomfortable performing electrical tests or disassembling your dryer, it is always best to call a qualified appliance technician. The risk of fire or further damage is too high to ignore a persistent burning smell. Professional service calls typically range from $80-$150, plus parts and labor.
Our Recommendation🏆 TOP PICK
BlueStars Ultra Durable 2 Packs 3390719 Dryer Thermal Fuse - Compatible with Whirlpool & Kenmore Dryers - Replaces PS11741444
Check Price on Amazon- 3390719 Dryer Thermal Fuse - PACK OF 2.
- Compatible with most top name brands (Kenmore, Whirlpool, KitchenAid, Maytag), fits models: 106.97502820.
- The part is made from durable high quality material and well-tested by the manufacturer - Meet OEM.
- Inexpensive way to fix or repair a dryer. The good quality thermal fuse can be applied for a long time. It.
BlueStars 3977393 Dryer Thermal Fuse - Compatible with Whirlpool Maytag Roper Kenmore KitchenAid Dryers - Replaces AP3094244
Check Price on Amazon- Please check the model number carefully before ordering. If you're unsure about the compatibility, send us.
- 3977393 Dryer Thermal Fuse (309 degrees) - PACK OF 12. It is an essential part of the dryer that prevents.
- It is made exactly fit for most top name brands (Whirlpool, Kenmore, Maytag, Roper, KitchenAid, Crosley.
- Inexpensive way to fix or repair a dryer. It will take you 15-30 minutes to repair, and you will just need.


