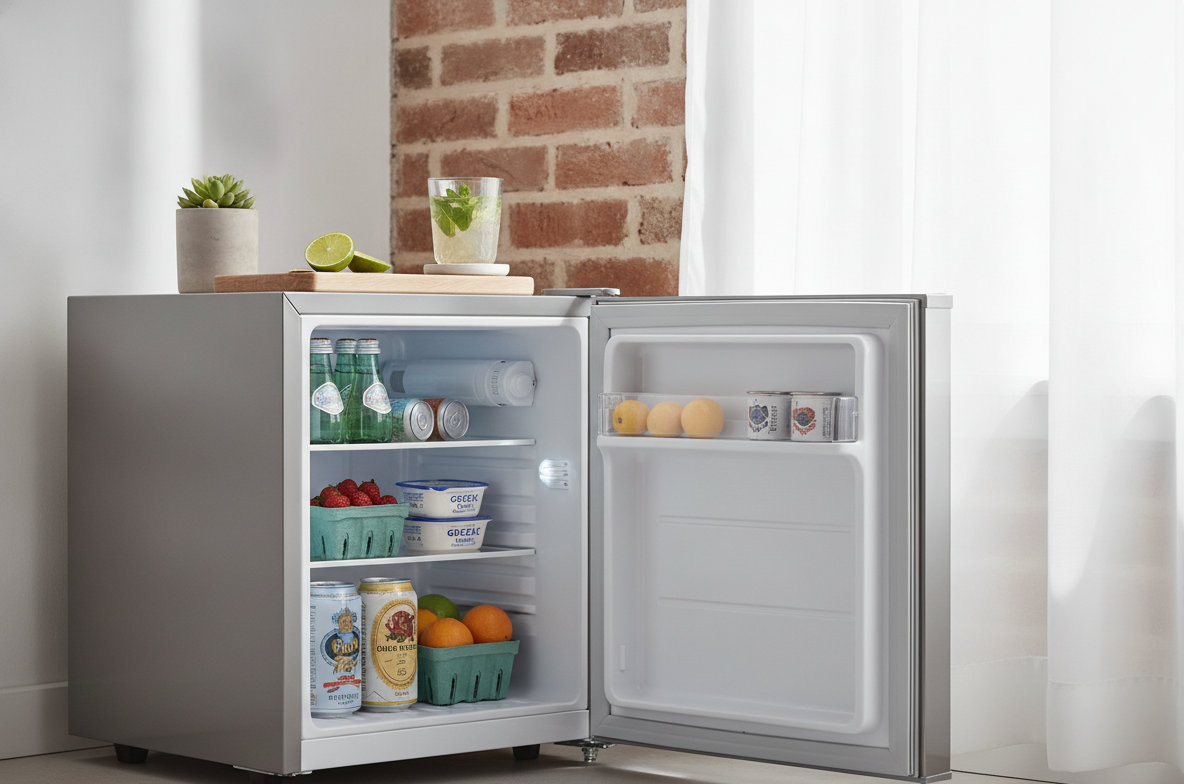
Frigidaire 242303001 Air Damper Control Assembly Kit for Refrigerators, White
- Quality Craftsmanship: The Frigidaire 242303001 Air Damper Control Assembly Kit is designed and engineered.
- Tools Required: To install this item, you'll need the following: 1/4" nut driver, 5/16" nut driver.
- Repair Skill Level: Experienced DIYer | For optimal results, it's recommended that someone with DIY.
- Compatibility: Check the appliance user manual to verify that this part is compatible with your appliance.

242303001 Refrigerator Damper Assembly Air Damper Control Assembly Compatible with Frigidaire Compatible with Crosley White
- Refrigerator Damper Assembly: Allows control of the flow of cold air from the freezer into the.
- Repairable faults:1. Refrigerator too cold: When the damper control assembly fails it will cause the.
- Air Damper Control Assembly:Refrigerator Damper Assembly compatible with Crosley:CRSH232PB3 CRSH232PB5.
- Easy installation:Replace the damper control assembly : 1. Please disconnect the power supply first, put.
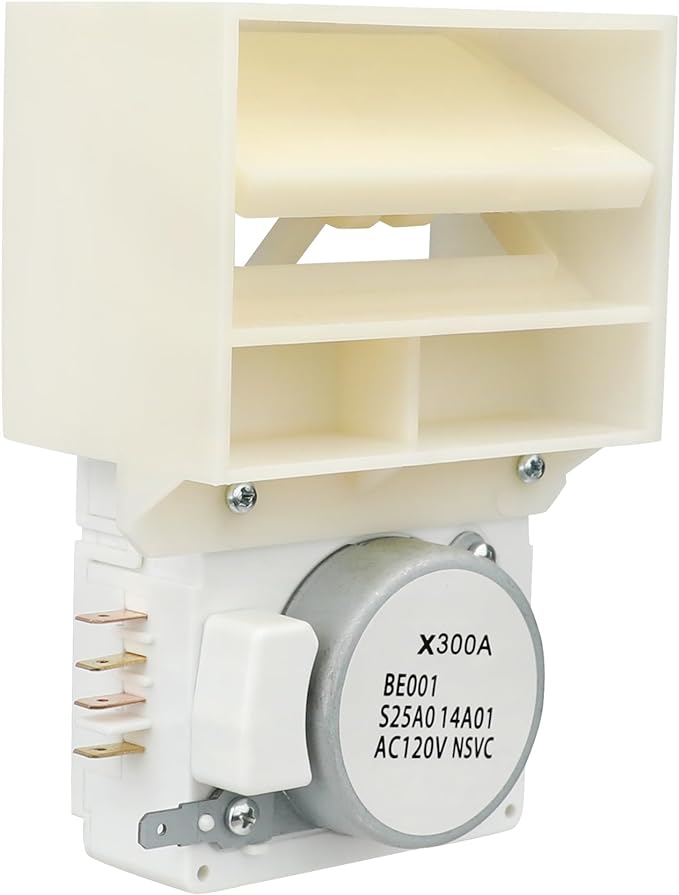
242303001 Air Damper Control Assembly Refrigerator Damper Assembly Compatible with Frigidaire Crosley White replaces
- Air Damper Control Assembly: 242303001 Damper Control Assembly Replacement Part.
- Feature: Dampers and motor control components to control cold air flow from the freezer into the fresh.
- Air Damper Control Assembly: 242303001 Refrigerator Damper Assembly compatible with.
- Air Damper Control Assembly: 242303001 Air Damper Control compatible with.
Ice crystals forming on items in your freezer but warm milk in the fridge means your refrigerator has an airflow problem. This common appliance issue typically points to one or two primary causes. Fixing these problems can restore your appliance's performance and prevent food spoilage.
A refrigerator works by circulating cold air from the freezer into the fresh food compartment. When this circulation is disrupted, the freezer might get excessively cold while the fridge struggles to maintain its temperature. Understanding the components involved helps with diagnosis.
The Air Damper Control Assembly Is Faulty
A faulty air damper control assembly is the most frequent reason for a freezer that is too cold and a refrigerator that is too warm. This small, motorized flap controls the flow of cold air from the freezer into the fresh food compartment. It opens and closes based on temperature readings to regulate cooling. When it fails, it often gets stuck in an open position. This allows too much frigid air to flood the freezer, making it extra cold, while insufficient cold air reaches the fresh food section, causing it to warm up.
Diagnosing a Faulty Air Damper
You can often diagnose a faulty damper by listening for its operation or by visually inspecting it. First, unplug your refrigerator for safety. The damper is usually located at the back of the fresh food compartment, where air vents connect to the freezer. You might need to remove a plastic cover or light housing to access it. Look for any visible obstructions preventing the damper from closing fully. Sometimes, ice buildup can prevent proper movement. If the damper appears stuck open or does not respond when the fridge is plugged in and set to different temperatures, it likely needs replacement.
Replacing the Air Damper Control Assembly
Replacing the air damper control assembly is a repair many homeowners can complete. The part itself typically costs between $50 and $100. A professional service call for this repair usually ranges from $200 to $400, including parts and labor. If you decide to tackle this yourself, you will need a few basic tools. The Frigidaire 242303001 Air Damper Control Assembly Kit for Refrigerators, White is a top choice for many Frigidaire and Crosley models. Based on manufacturer data, installing this item typically requires a 1/4" nut driver and a 5/16" nut driver.
Here are the steps for replacement:
- Unplug the Refrigerator: Always disconnect power before starting any repair.
- Empty the Refrigerator: Remove all food and shelves from the fresh food compartment to gain access.
- Locate the Damper: Find the air damper assembly, usually behind a plastic panel at the top or rear of the fresh food section.
- Remove the Cover: Use your nut driver to remove the screws holding the plastic cover in place. Gently pry off the cover.
- Disconnect Wiring: Carefully unplug the electrical connector from the old damper assembly.
- Remove the Old Damper: Unscrew any mounting screws holding the damper in place and slide it out.
- Install the New Damper: Connect the wiring to the new damper. Secure it with the mounting screws.
- Replace the Cover: Reattach the plastic cover and secure it with screws.
- Restore Power: Plug the refrigerator back in and set the temperature. Monitor the temperatures over the next 24 hours.
This repair usually takes less than an hour for an experienced DIYer. The cost savings can be substantial.
Evaporator Fan Motor Not Working
The evaporator fan motor is another common culprit when the freezer is too cold but the fridge is warm. This fan, located in the freezer compartment, circulates cold air over the evaporator coils and then pushes it through ducts into the fresh food section. If the fan motor fails, cold air cannot be properly distributed. The freezer might still get very cold because the coils are there, but the fresh food compartment will warm significantly due to lack of airflow.
Troubleshooting the Evaporator Fan
Listen for the fan running when the freezer door is closed. If you hear no fan noise or only a faint whirring sound, it might be faulty. To test it, open the freezer door and manually depress the door switch. This should activate the fan. If it does not spin, or spins slowly and noisily, the motor is likely failing. Sometimes, ice buildup can impede the fan blades, creating noise or stopping the fan entirely.
Replacing the Evaporator Fan Motor
Replacing an evaporator fan motor is a moderate DIY task. The part typically costs $100 to $200. A professional repair will generally cost between $250 and $500. You will need a screwdriver set, possibly a nut driver, and patience. The fan is usually behind a panel at the back of the freezer compartment.
- Unplug the Refrigerator: Safety first, always disconnect power.
- Empty the Freezer: Remove all food and shelves.
- Remove the Back Panel: Locate and remove the screws holding the back panel of the freezer. This panel covers the evaporator coils and fan.
- Inspect for Ice: Look for heavy ice buildup around the fan or coils. If present, a full defrost might fix the issue.
- Disconnect the Fan: Unplug the electrical connector from the fan motor. Remove any mounting screws or clips holding the motor in place.
- Install the New Fan: Attach the new motor, connect the wiring, and secure it.
- Reassemble: Replace the back panel, shelves, and food.
- Restore Power: Plug the refrigerator back in.
Clogged Condenser Coils
Dirty condenser coils can also contribute to a warm fridge, though they usually cause overall poor cooling in both compartments rather than just a too-cold freezer. The condenser coils, located on the back or underneath the refrigerator, dissipate heat from the refrigerant. If they are covered in dust, pet hair, or debris, the refrigerator cannot efficiently release heat. This makes the compressor work harder, potentially leading to higher temperatures in the fresh food section and less efficient cooling throughout the unit.
Cleaning Condenser Coils
Cleaning condenser coils is a simple maintenance task that costs nothing if you do it yourself. A professional cleaning might cost $100 to $150. You should clean them every 6-12 months. For detailed instructions, see our guide on How to clean refrigerator condenser coils. All you need is a vacuum cleaner with a brush attachment and possibly a coil brush.
Excessive Frost on Evaporator Coils
Heavy frost buildup on the evaporator coils can severely restrict airflow, even if the evaporator fan motor is working. The coils become encased in ice, acting as a barrier. Cold air cannot properly pass over them to be cooled and circulated. This often results in a freezer that seems cold but struggles to cool the fresh food compartment effectively, or it might even make the freezer warmer than it should be if the frost buildup is extreme.
Defrosting Your Refrigerator
If you suspect excessive frost, a manual defrost is the simplest solution. This involves unplugging the refrigerator for 24-48 hours with the doors open, allowing all ice to melt. Place towels on the floor to catch melting water. After defrosting, plug the unit back in and monitor its performance. This fix costs nothing but time.
Faulty Thermistor or Temperature Sensor
The thermistor or temperature sensor monitors the temperature inside the refrigerator and freezer compartments. It sends these readings to the main control board, which then adjusts cooling cycles. If a thermistor is faulty, it might send incorrect readings, causing the control board to mismanage cooling. For example, it might tell the freezer to keep cooling while failing to direct enough cold air to the fridge, leading to the freezer being too cold and the fridge being too warm.
Testing a Thermistor
Testing a thermistor requires a multimeter to check its resistance. Unplug the refrigerator and locate the thermistor, usually clipped onto an evaporator coil or a wall in the fresh food compartment. Disconnect it and measure its resistance. Compare the reading to the manufacturer's specifications. A faulty thermistor will show an open circuit, a short circuit, or resistance outside the specified range. An electrical test kit is essential for this type of diagnosis.
A new thermistor typically costs $20 to $50. If you hire a professional, the total repair cost could be $200 to $450.
Main Control Board Issues
While less common, a malfunctioning main control board can cause various cooling problems, including the freezer being too cold and the fridge being too warm. The control board is the brain of the refrigerator, managing all components like the compressor, fans, and damper. If it sends incorrect signals or fails to receive proper input from sensors, it can lead to erratic temperature control.
Diagnosing Control Board Problems
Diagnosing a control board issue is difficult without specialized tools and expertise. It is often considered only after ruling out all other more common causes. Symptoms might include multiple components failing simultaneously or inconsistent operation. Replacing a main control board can cost $150 to $300 for the part alone. A professional repair would likely be $300 to $600 or more, making it an expensive fix.
Compromised Door Seals
Damaged or worn-out door seals, also known as gaskets, can allow warm air to leak into the fresh food compartment. This forces the refrigerator to work harder to maintain temperature. While this typically causes the fridge to be warm and the freezer to be less efficient, in some cases, the freezer might compensate by running more, leading to lower temperatures, while the constant influx of warm air keeps the fridge warm.
Checking and Replacing Door Seals
Inspect your door seals for cracks, tears, or gaps. You can perform a simple paper test: close the door on a piece of paper. If you can pull the paper out easily, the seal is compromised. Replace damaged seals to restore efficiency. New door gaskets typically cost $30 to $100 per door, depending on the model. This is a relatively easy DIY repair.
When to Call a Professional
If you have gone through these troubleshooting steps and the problem persists, or if you are uncomfortable performing electrical tests or component replacements, it is time to call a professional appliance technician. A service call typically costs $75 to $150 just for the diagnostic visit. They have specialized tools and training to accurately pinpoint complex issues. For older or less expensive refrigerators, consider the cost of repair versus replacement. A major repair might not be worth it for a unit nearing the end of its lifespan.
Frigidaire 242303001 Air Damper Control Assembly Kit for Refrigerators, White
- Quality Craftsmanship: The Frigidaire 242303001 Air Damper Control Assembly Kit is designed and engineered.
- Tools Required: To install this item, you'll need the following: 1/4" nut driver, 5/16" nut driver.
- Repair Skill Level: Experienced DIYer | For optimal results, it's recommended that someone with DIY.
- Compatibility: Check the appliance user manual to verify that this part is compatible with your appliance.
242303001 Refrigerator Damper Assembly Air Damper Control Assembly Compatible with Frigidaire Compatible with Crosley White
- Refrigerator Damper Assembly: Allows control of the flow of cold air from the freezer into the.
- Repairable faults:1. Refrigerator too cold: When the damper control assembly fails it will cause the.
- Air Damper Control Assembly:Refrigerator Damper Assembly compatible with Crosley:CRSH232PB3 CRSH232PB5.
- Easy installation:Replace the damper control assembly : 1. Please disconnect the power supply first, put.
242303001 Air Damper Control Assembly Refrigerator Damper Assembly Compatible with Frigidaire Crosley White replaces
- Air Damper Control Assembly: 242303001 Damper Control Assembly Replacement Part.
- Feature: Dampers and motor control components to control cold air flow from the freezer into the fresh.
- Air Damper Control Assembly: 242303001 Refrigerator Damper Assembly compatible with.
- Air Damper Control Assembly: 242303001 Air Damper Control compatible with.